

Speed up your APEX development using Session Overrides and VS Code
Learn how to accelerate the development process by using the new Session Overrides APEX feature and one of the Visual Studio Code extensions.


What is Session Overrides
Session Overrides are a convenient way for developers to quickly change values in the session that the APEX engine is typically responsible for, like File Paths, Additional Files and Globalization Attributes.
Here is the official documentation.
Okay, but how do Session Overrides speed up the development process?
They speed it up because it allows using a local JS or CSS files on your machine which are referenced in the app. This way you don't have to go to the Shared Components and edit your Workspace or Application files before you can see the results in the app. Very convenient feature - once you start to use it, you'll never look back. Small detail - it's available since APEX version 22.1
Visual Studio Code setup
Install Visual Studio Code (VS Code) if you don't already have it installed - visit the official website
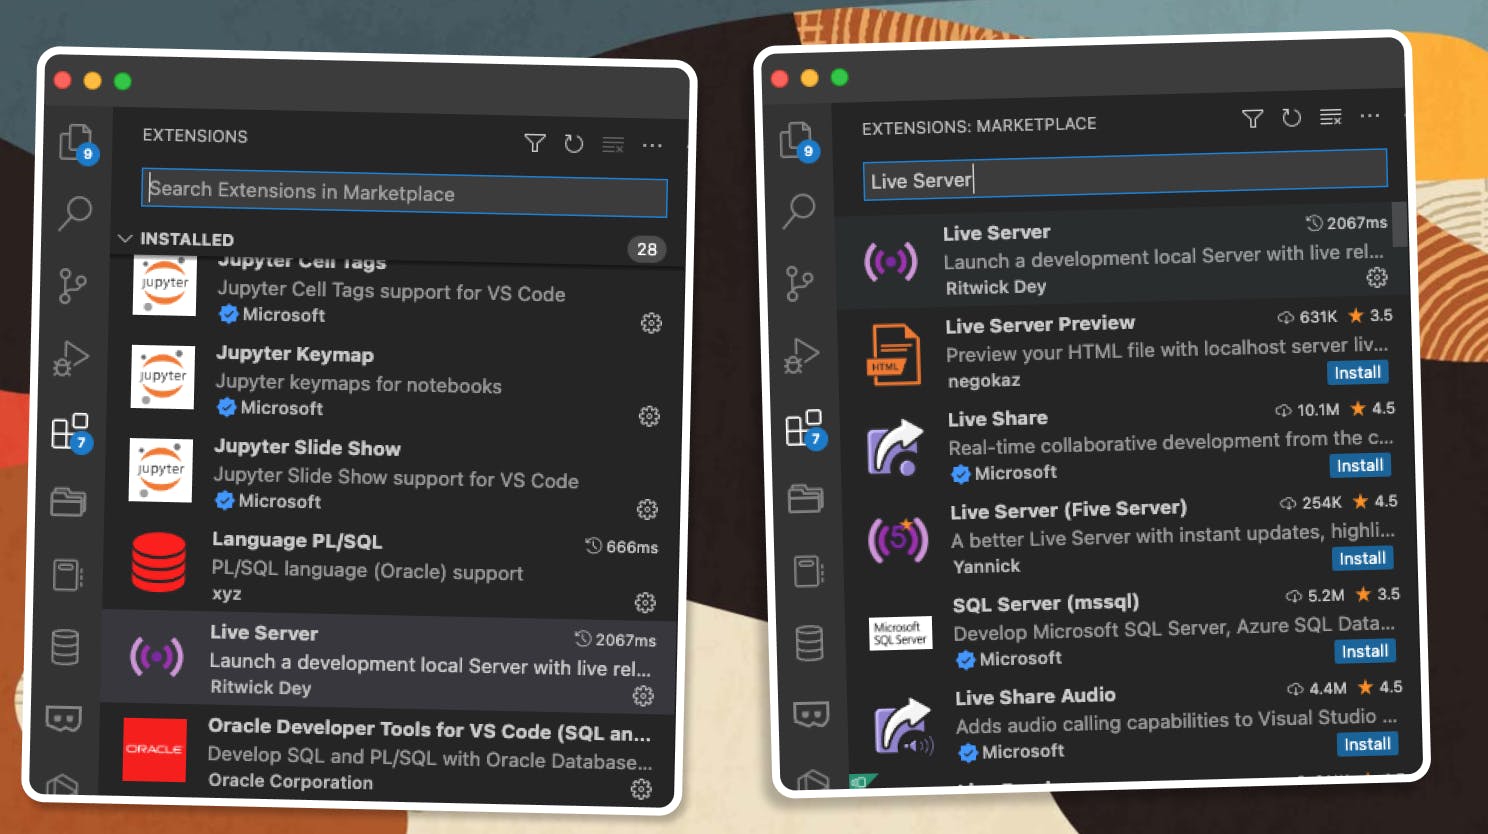
Install "Live Server" extension
- Open VS Code and navigate to the
Extensionsmenu item on the left. - Search for the
Live Serverextension. - Click on it, as shown in the screenshot. The extension page will open.
- Click Install so you add the extension to your VS Code instance.

- Open VS Code and navigate to the
Create a new folder on your machine (
Localfilesfor example) and two files we will be using in our APEX application -apex_session_override.jsandapex_session_override.css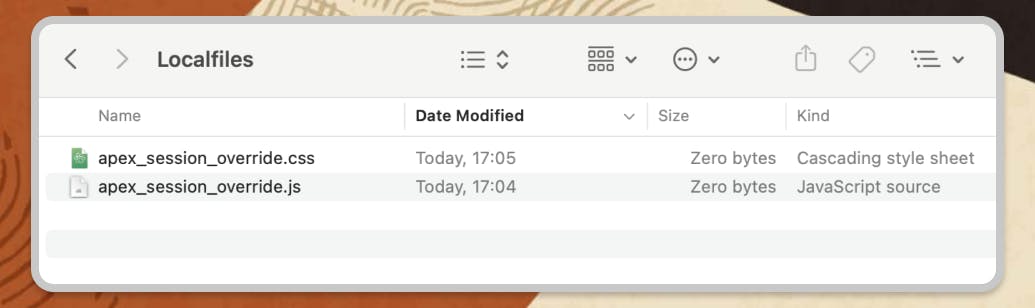
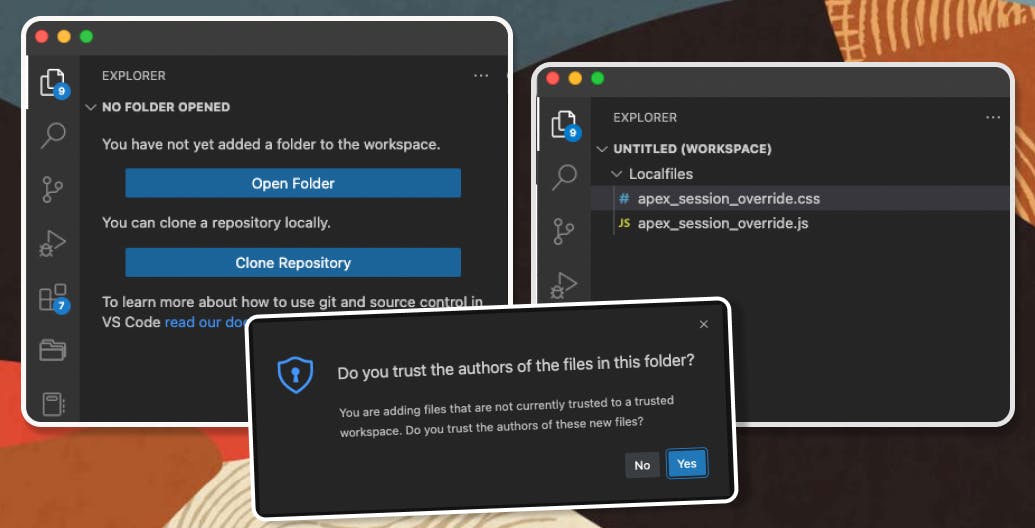
Add
New Folderin VS Code- Going back to VS Code, open the
Explorer(first item in the menu) - Click on
Open Folderand select theLocalfilesfolder you have already created - Confirm that you trust the files in this folder (obviously)
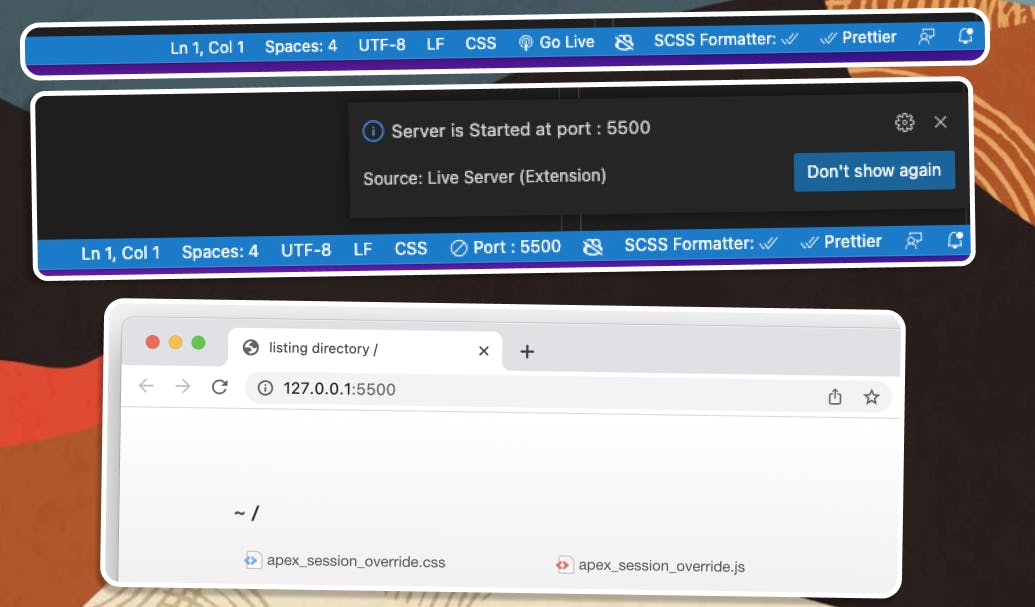
- After confirming, select the
Go Liveoption in the bottom right of VS Code editor - It will start a
localhostserver on your machine with both files listed and accessible athttp://127.0.0.1:5500/
- Going back to VS Code, open the
APEX setup
Enable
Session Overridesin your APEX Application- Make sure you are logged into the APEX Builder, so that
APEX Dev Toolbaris available - Select
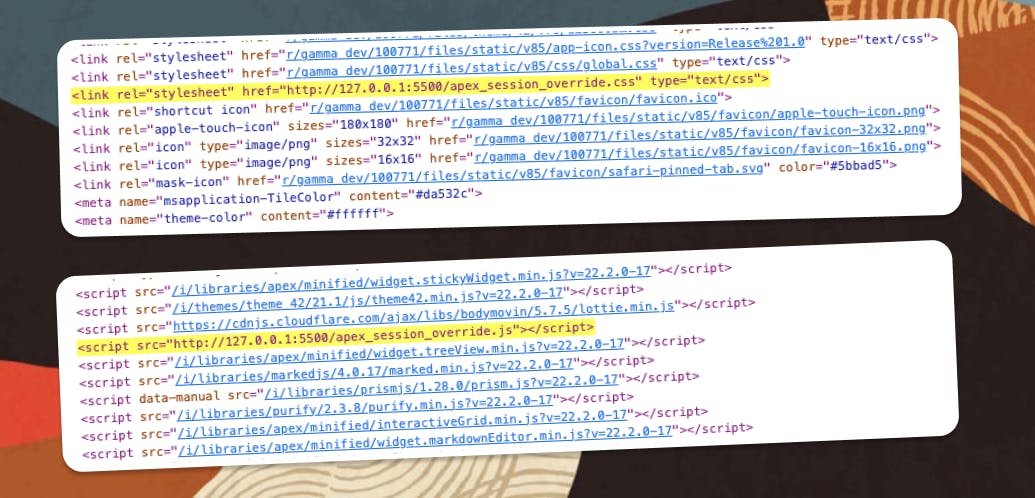
Session/Session Overrides - Click the toggle to enable them and add the URLs for the CSS and JS files as shown
- Click
Saveto confirm your changes - Both files should now be available on your page. To validate that, you can use the Browser Dev Tools, as shown

- Make sure you are logged into the APEX Builder, so that
Test your setup
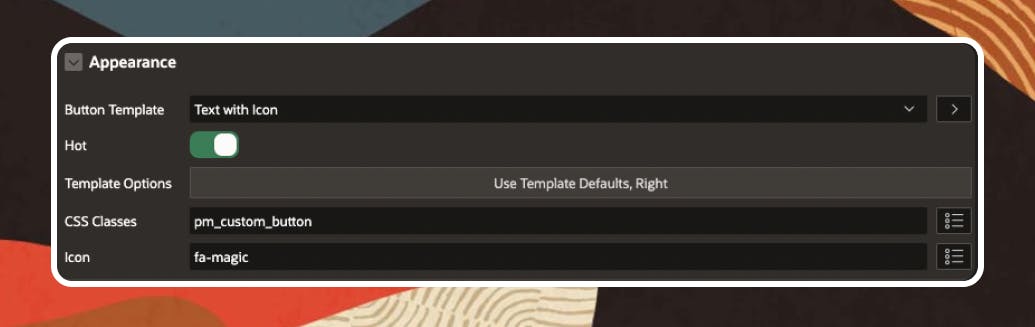
- To test the Session Overrides, create a Page Item (Button), using the following settings:
- Update the CSS file we already created with some style for the page button
- Save the document and refresh the page
- Enjoy the changes
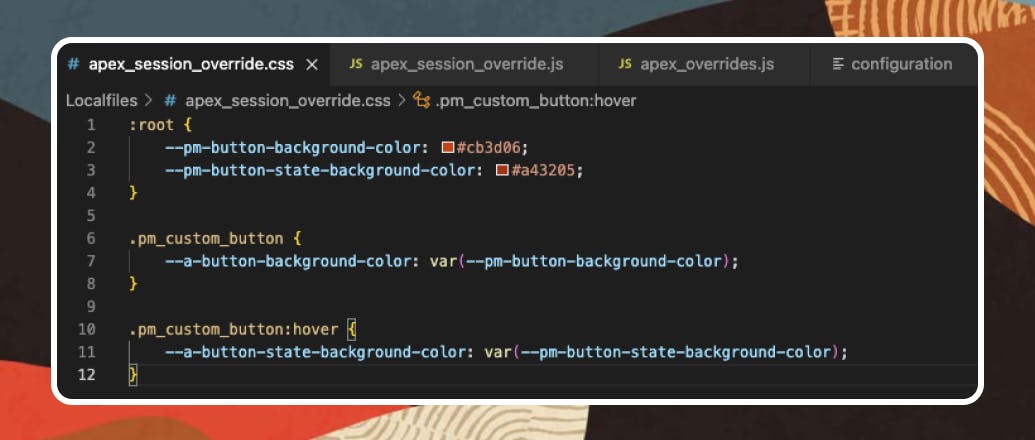
:root {
    --pm-button-background-color: #cb3d06;
    --pm-button-state-background-color: #a43205;
}

.pm_custom_button {
    --a-button-background-color: var(--pm-button-background-color);
}

.pm_custom_button:hover {
    --a-button-state-background-color: var(--pm-button-state-background-color);
}
Follow me
Liked that post? Follow me on Twitter and LinkedIn!
🔷 @plamen_9 on Twitter
🔷 Plamen Mushkov on LinkedIn